Build, Organize, and Publish Your Courses on Berrytap
Learn how to create courses, organize content into modules and lessons, and control visibility with draft and publish settings on Berrytap.
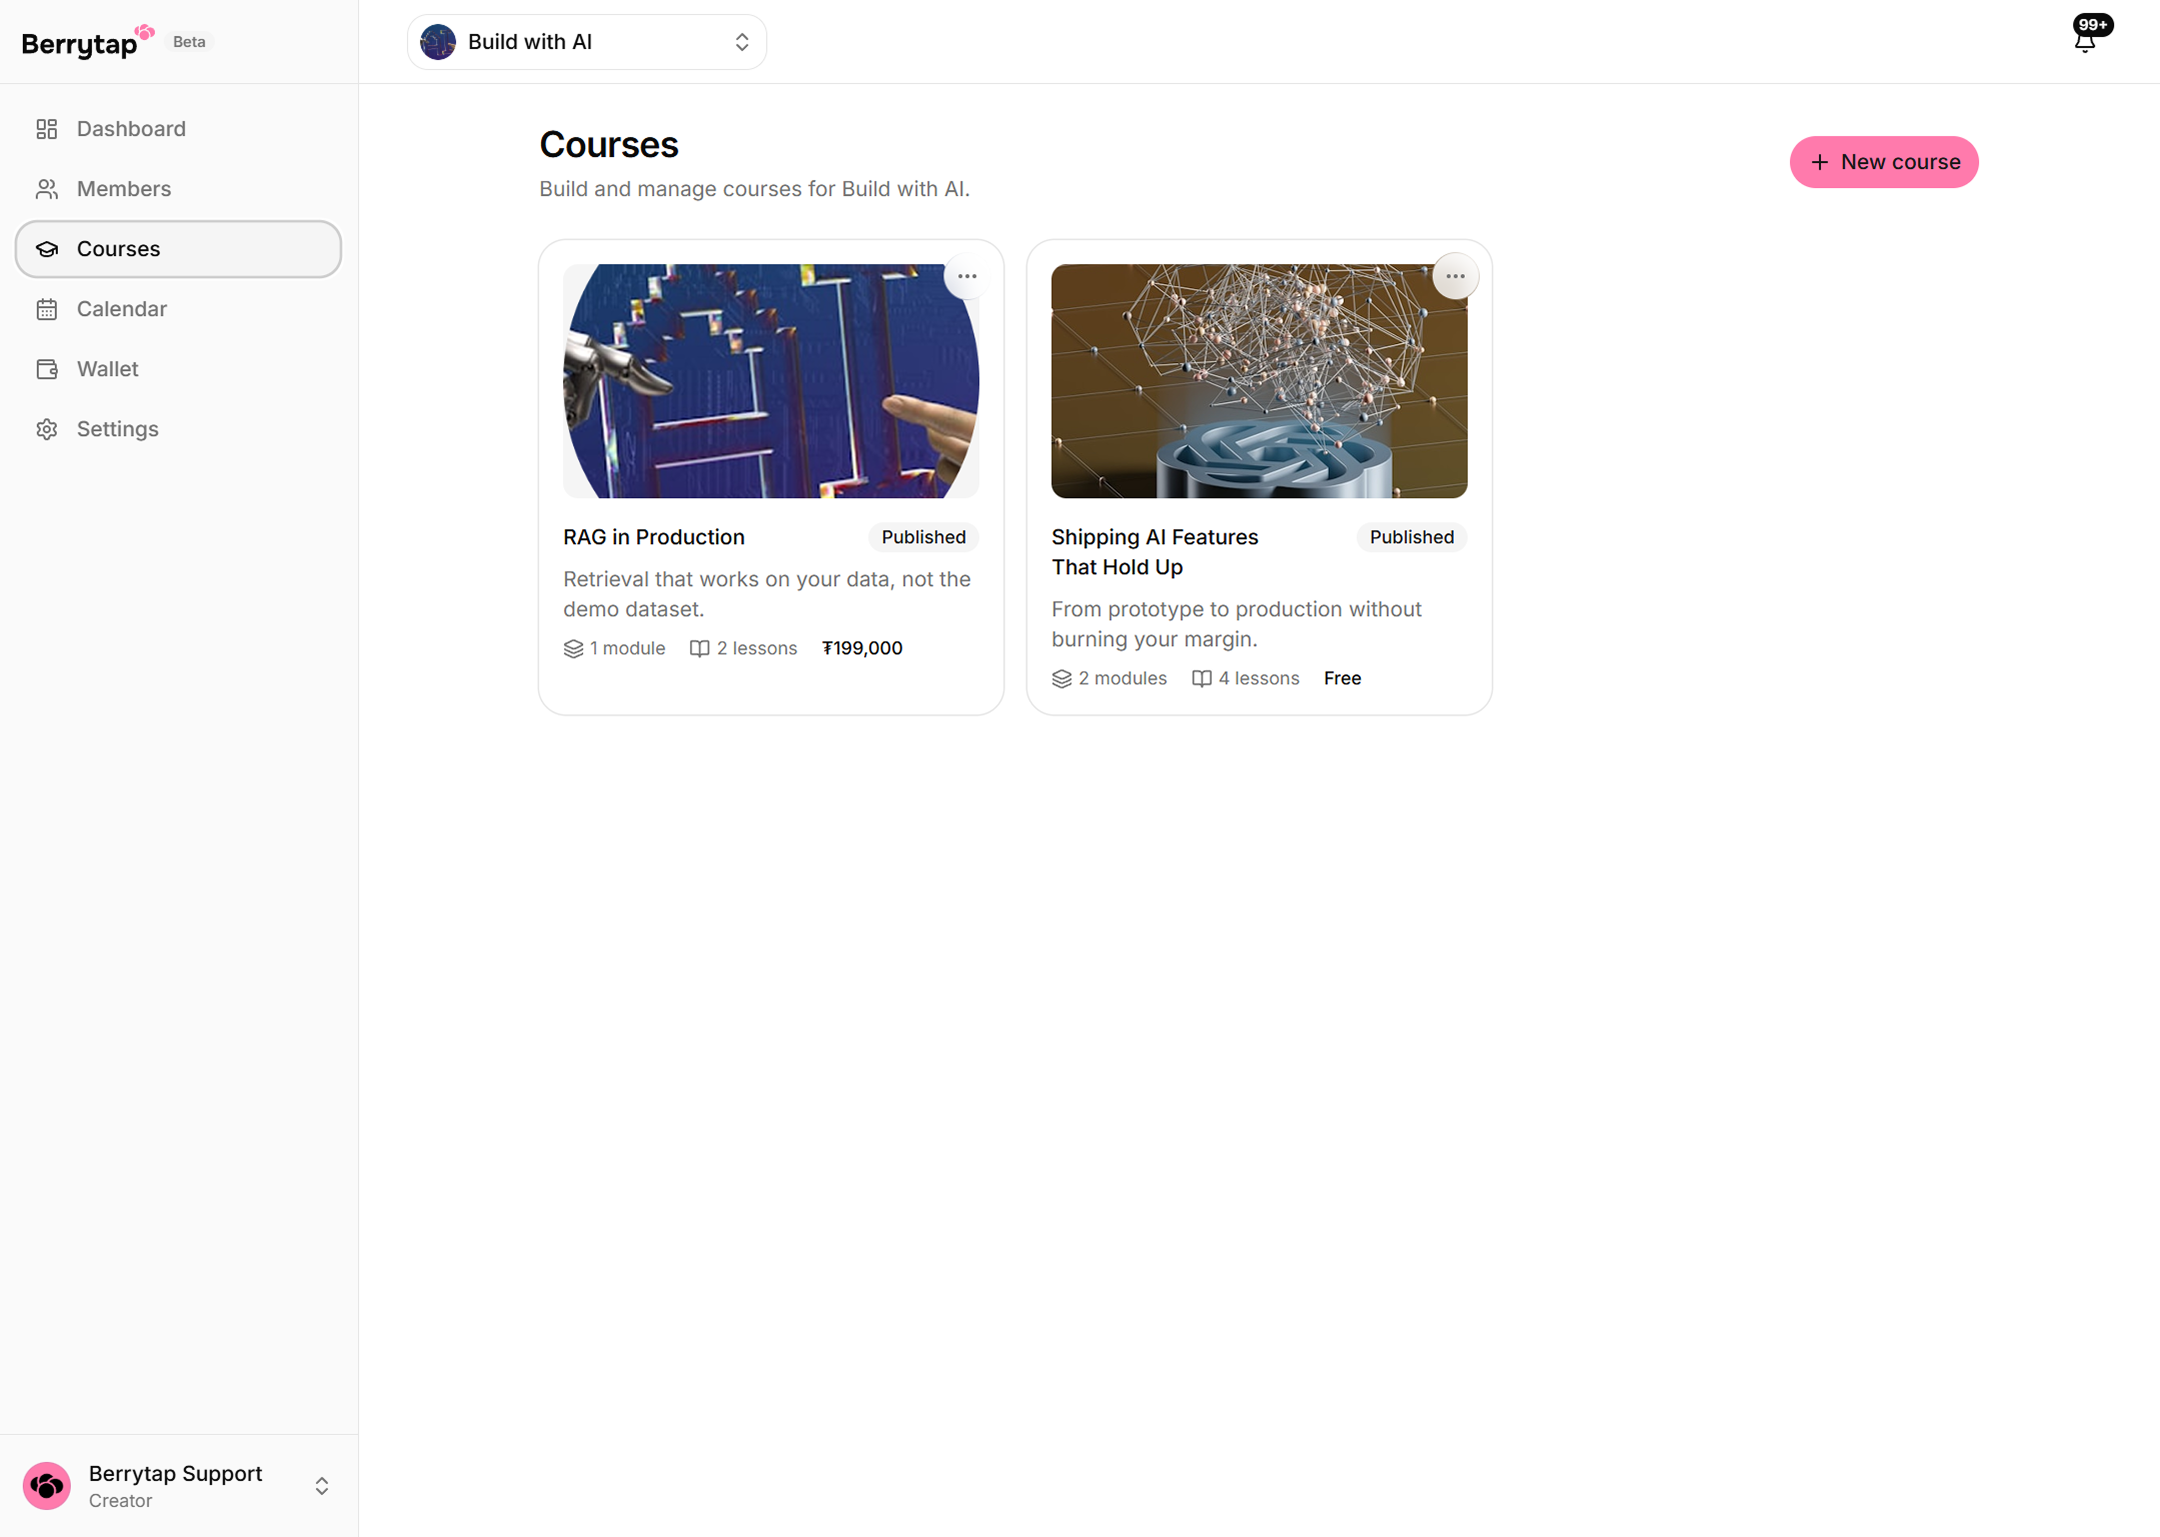
The course builder is your home base for creating structured learning experiences. From here you create courses, group lessons into modules, and control exactly what your members can see and when. Everything lives under Dashboard → Courses.
Creating a course
Open the Courses dashboard
Navigate to Dashboard → Courses and click New Course.
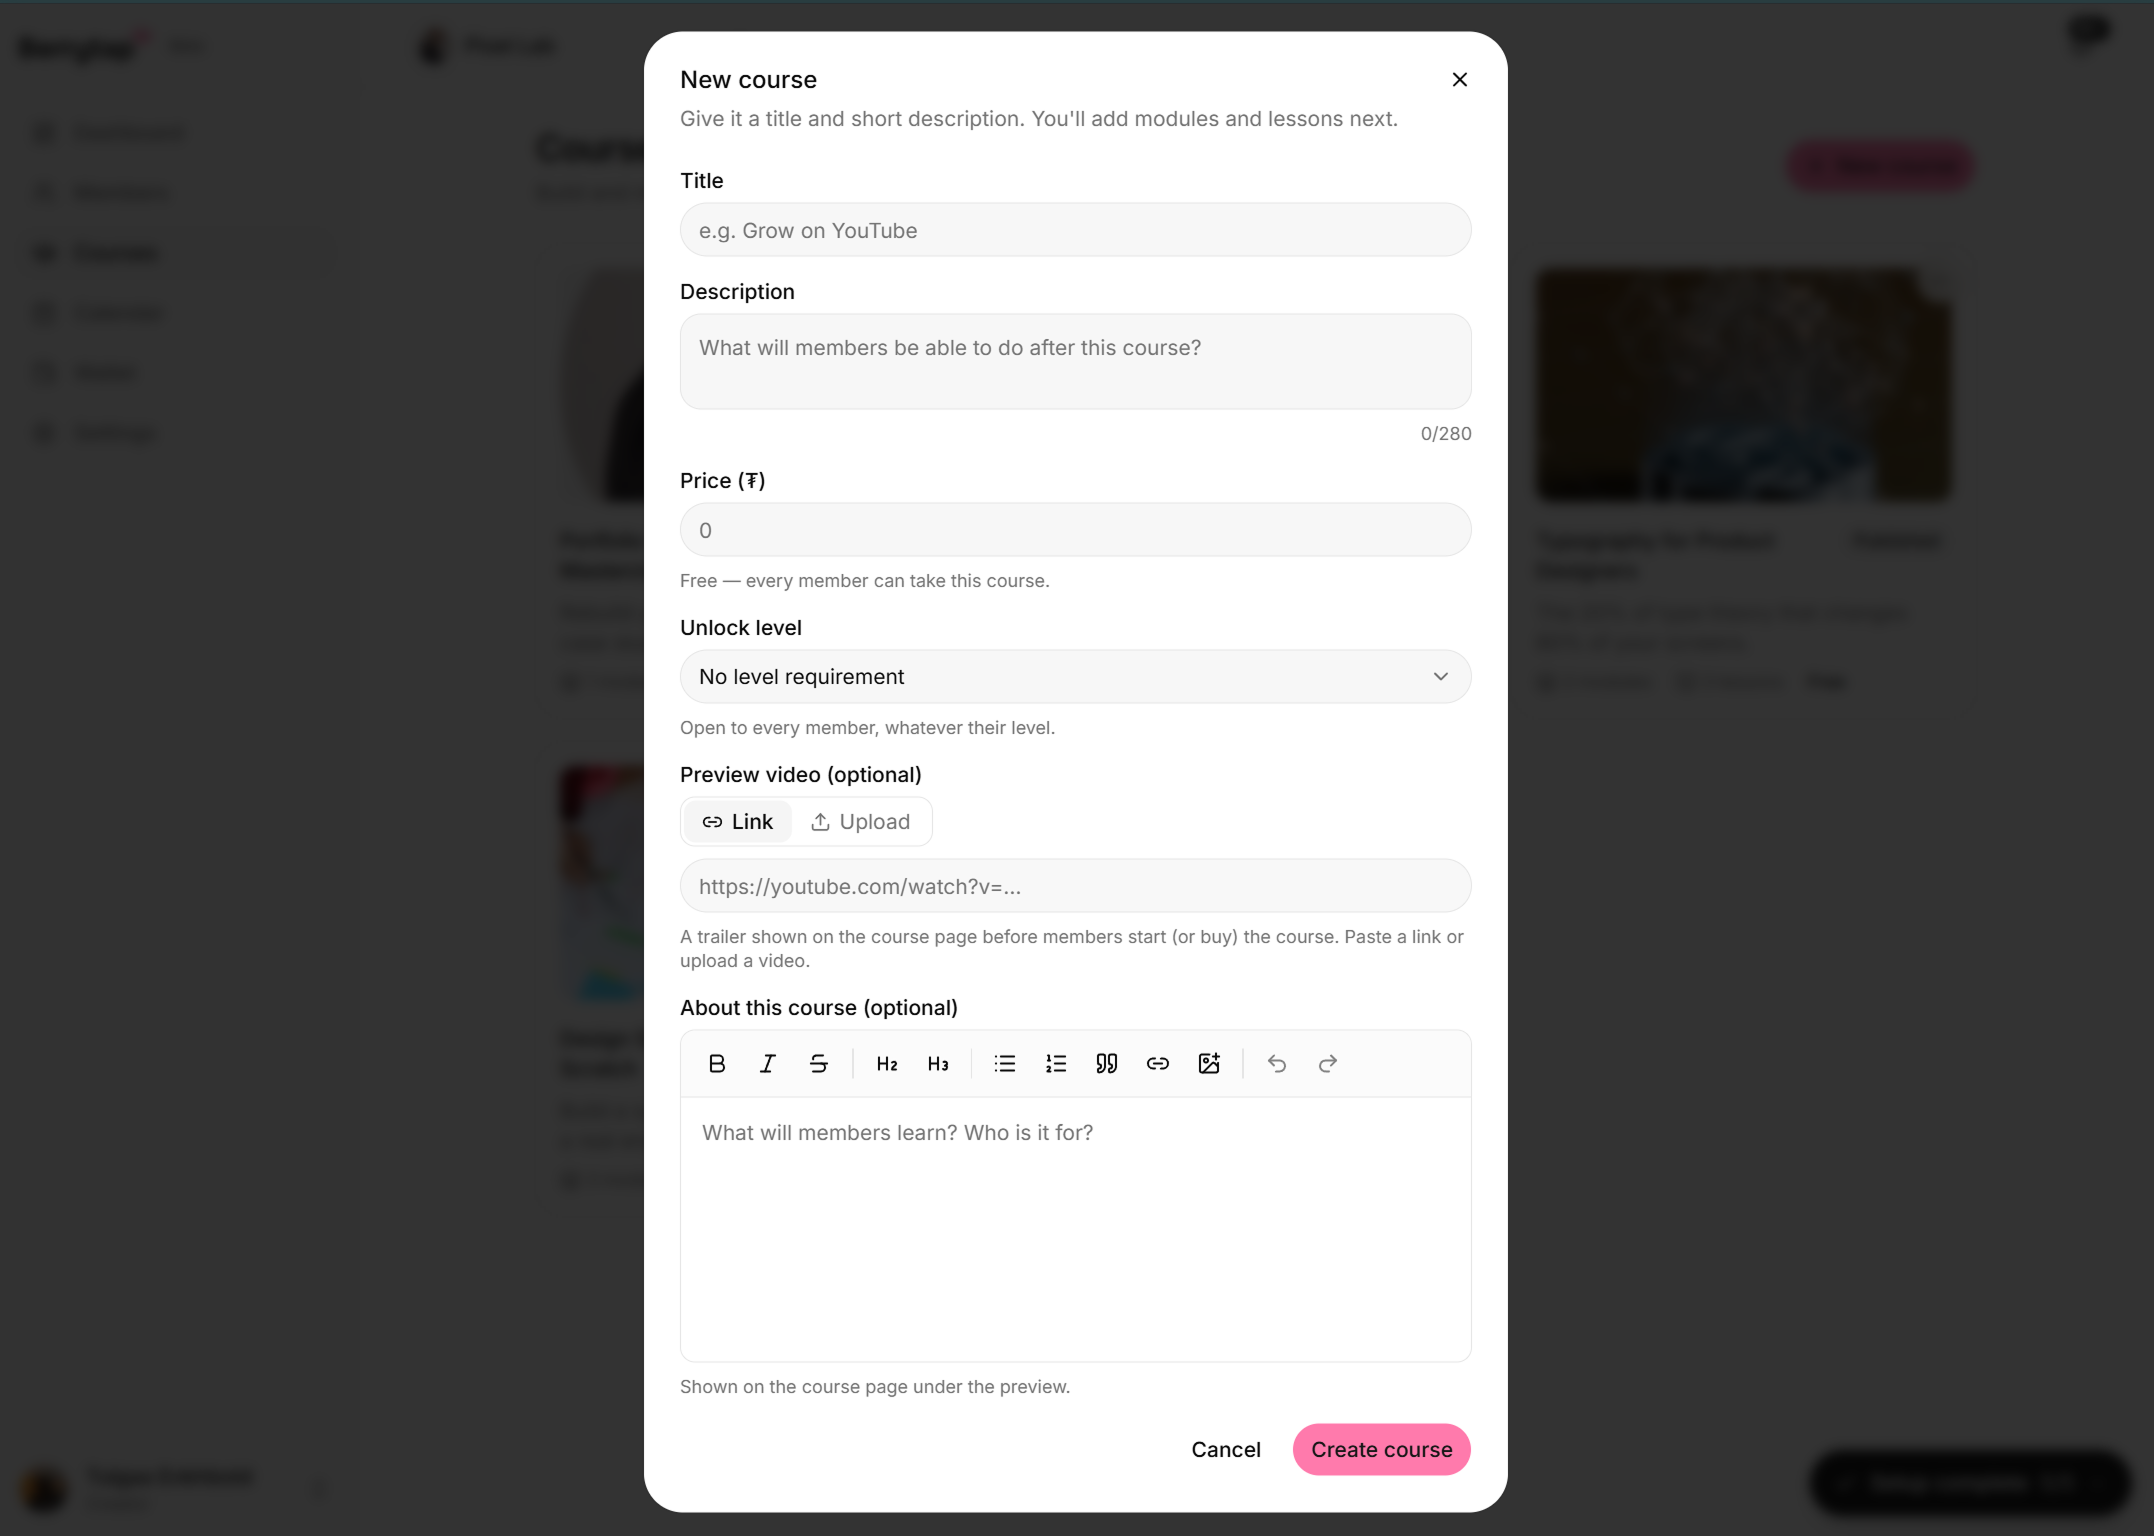
Fill in the course details
Enter the following information:
| Field | Description |
|---|---|
| Title | The name members will see in the course library |
| Description | A short summary of what members will learn |
| Thumbnail | A cover image displayed in the library card |
| Category | Helps members browse and filter your content |
Save as a draft
Click Save. Your course is saved as an unpublished draft — members cannot see it yet. You can continue editing at any time before publishing.
Organizing with modules
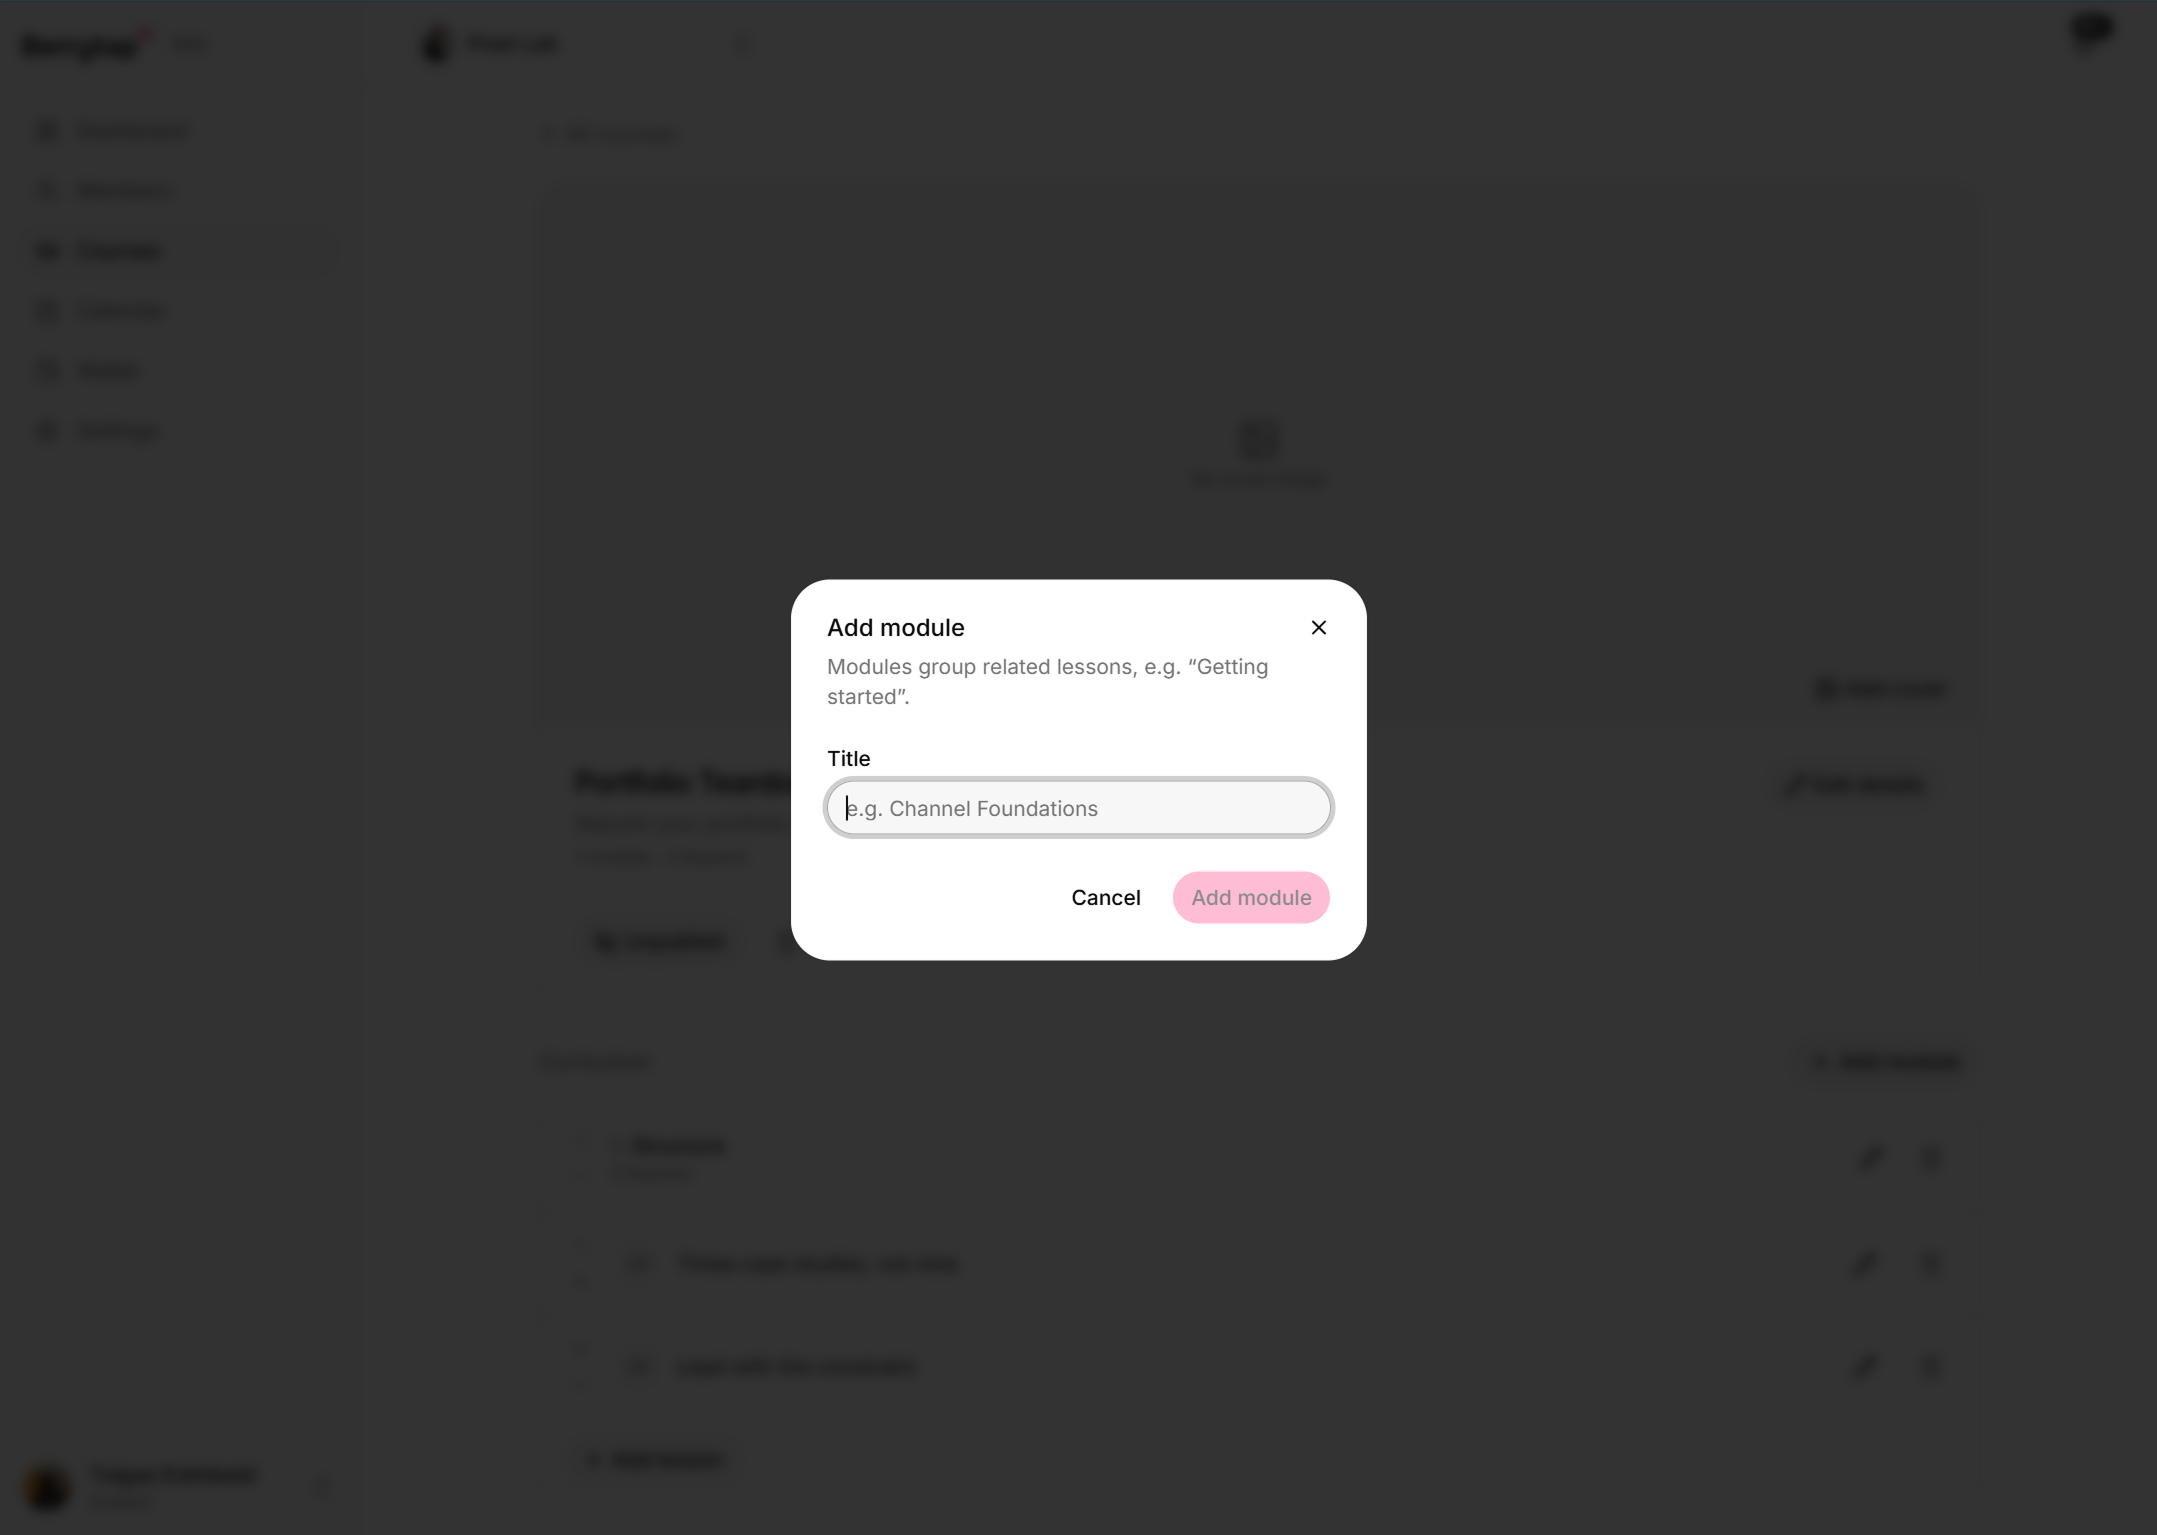
A module is a named chapter that groups related lessons together. You can add as many modules as your course needs, and each module holds one or more lessons.
To add a module, open your course and click Add Module, then give it a clear name (for example, "Week 1 – Foundations" or "Chapter 2 – Advanced Techniques"). Once you have multiple modules and lessons, drag and drop them to reorder everything exactly the way you want — both module order and the lesson order within each module are fully adjustable.
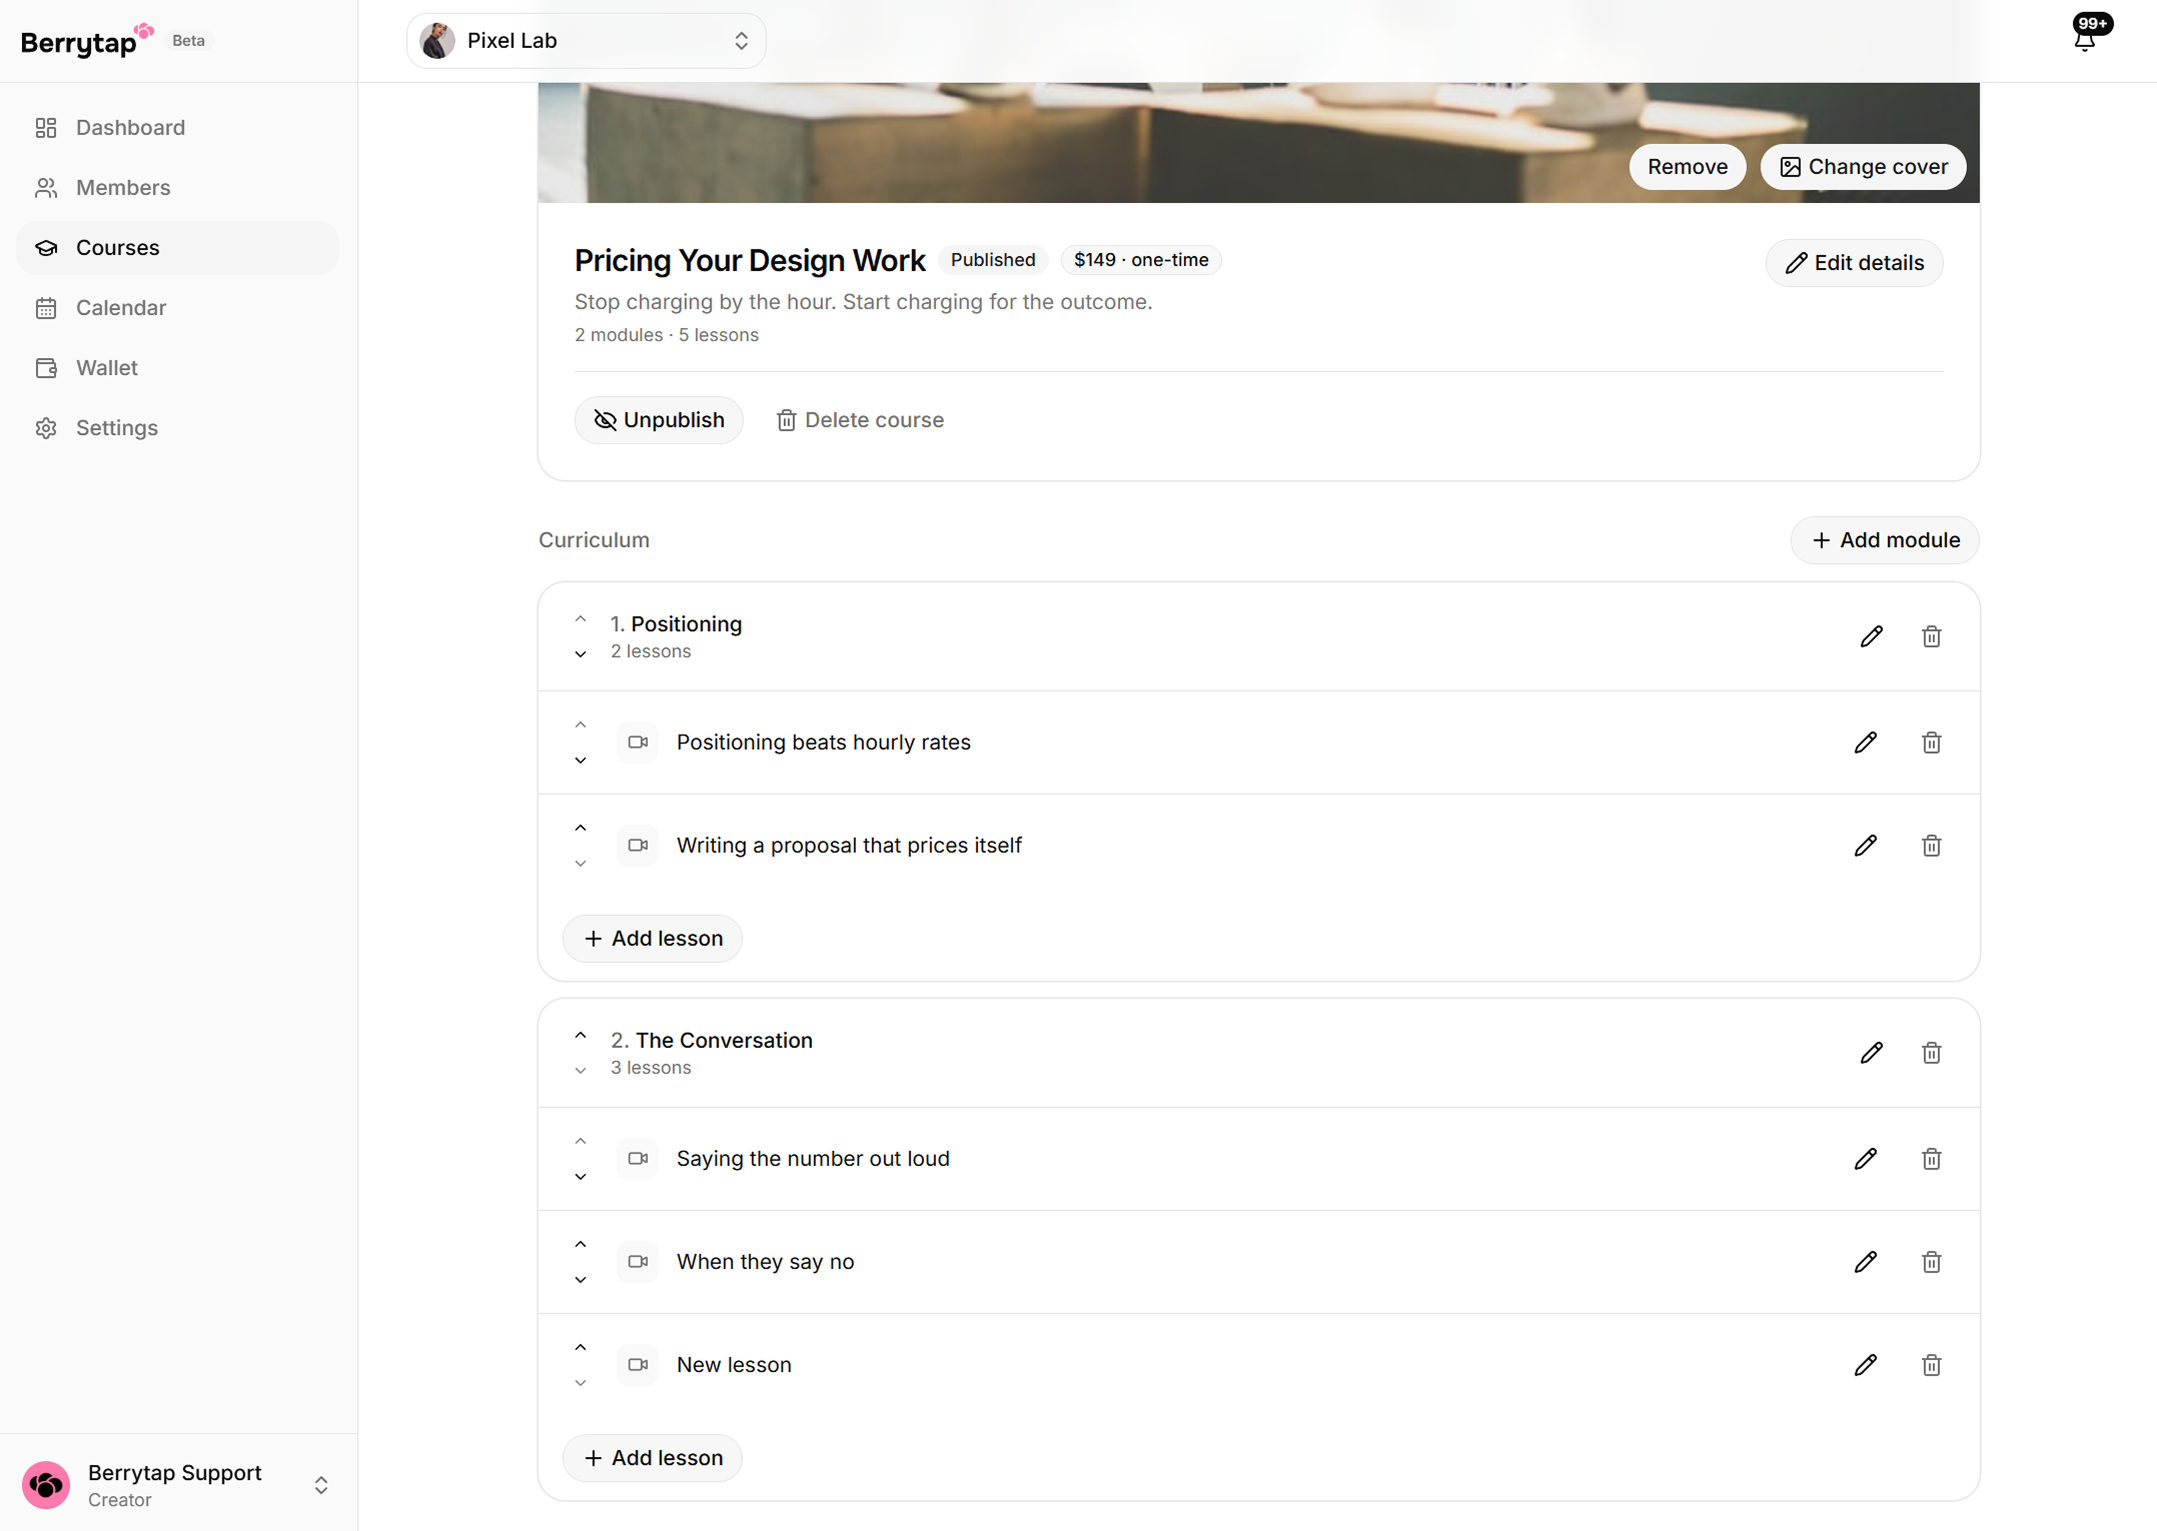
Build out one complete module before you publish. A single polished module gives early members something valuable to start with while you continue creating the rest.
Publishing
When your course is ready for members, flip the toggle from Unpublished to Published on the course settings page. While unpublished, the course is completely invisible to members — it won't appear in the library or in any search results.
Before publishing, use the Preview as Member button to walk through the course exactly as a member would experience it. Check that modules and lessons are in the right order, videos play correctly, and the course description reads well.
Course settings
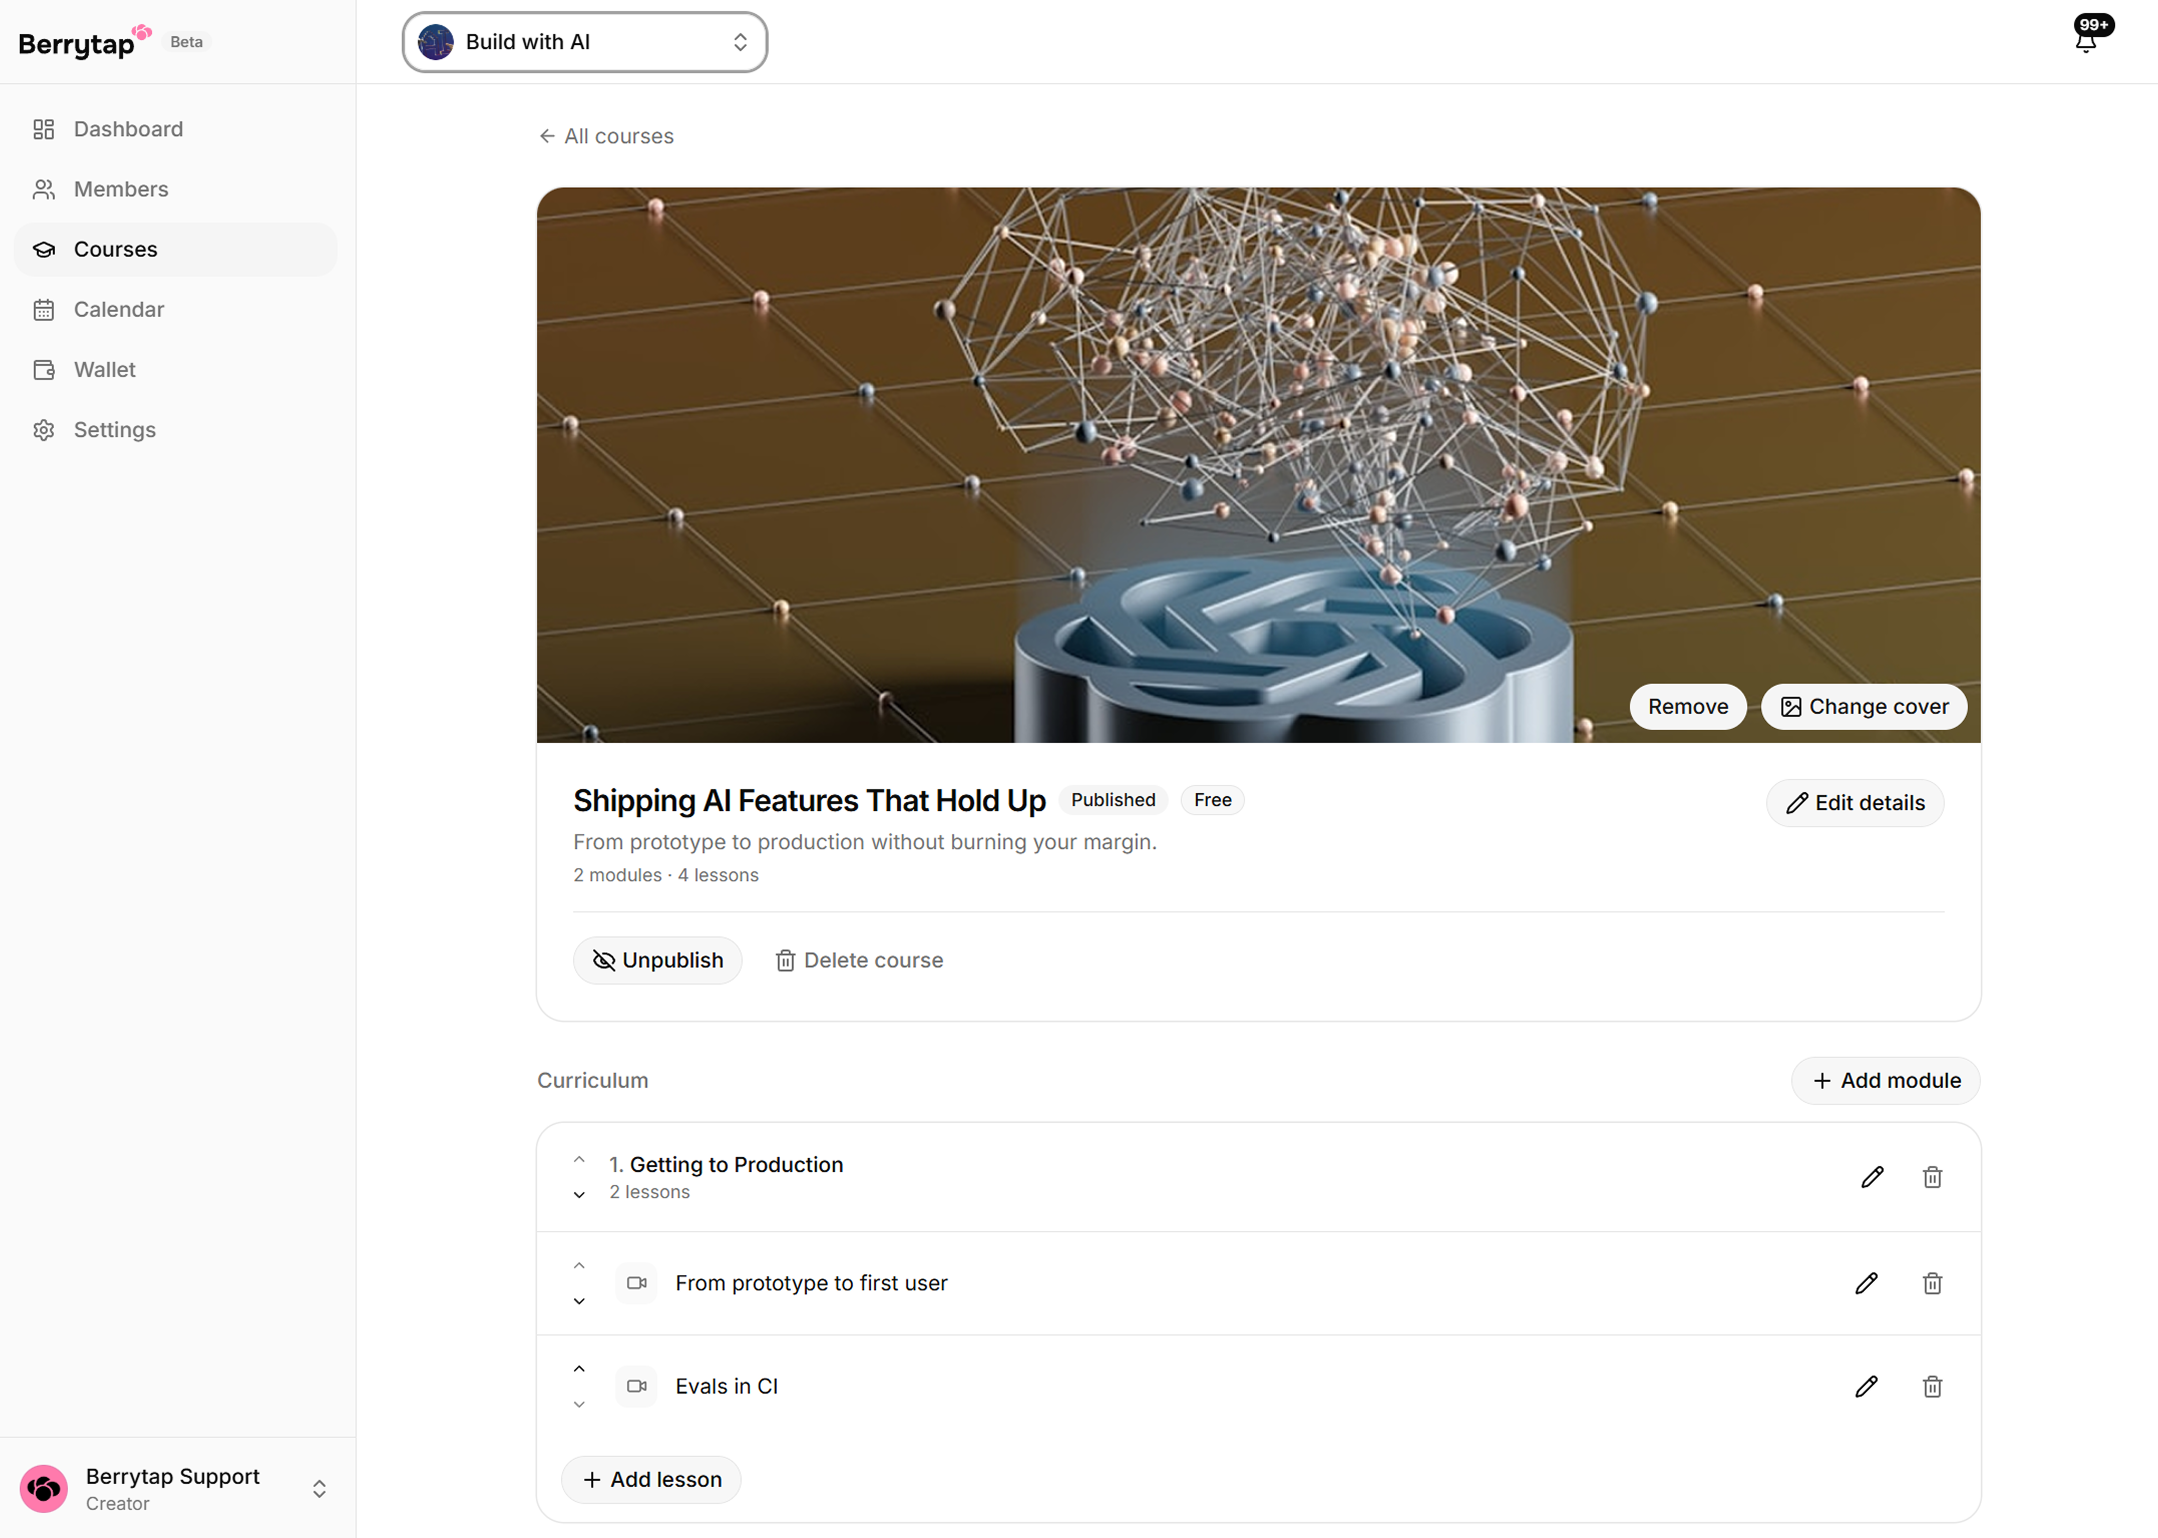
After you create a course, the settings panel lets you control access and pricing:
- Included in membership — the course is free for all active members at no extra charge.
- Paid one-time purchase — members pay a one-time fee to unlock the course. You set the price and members get lifetime access after purchasing.
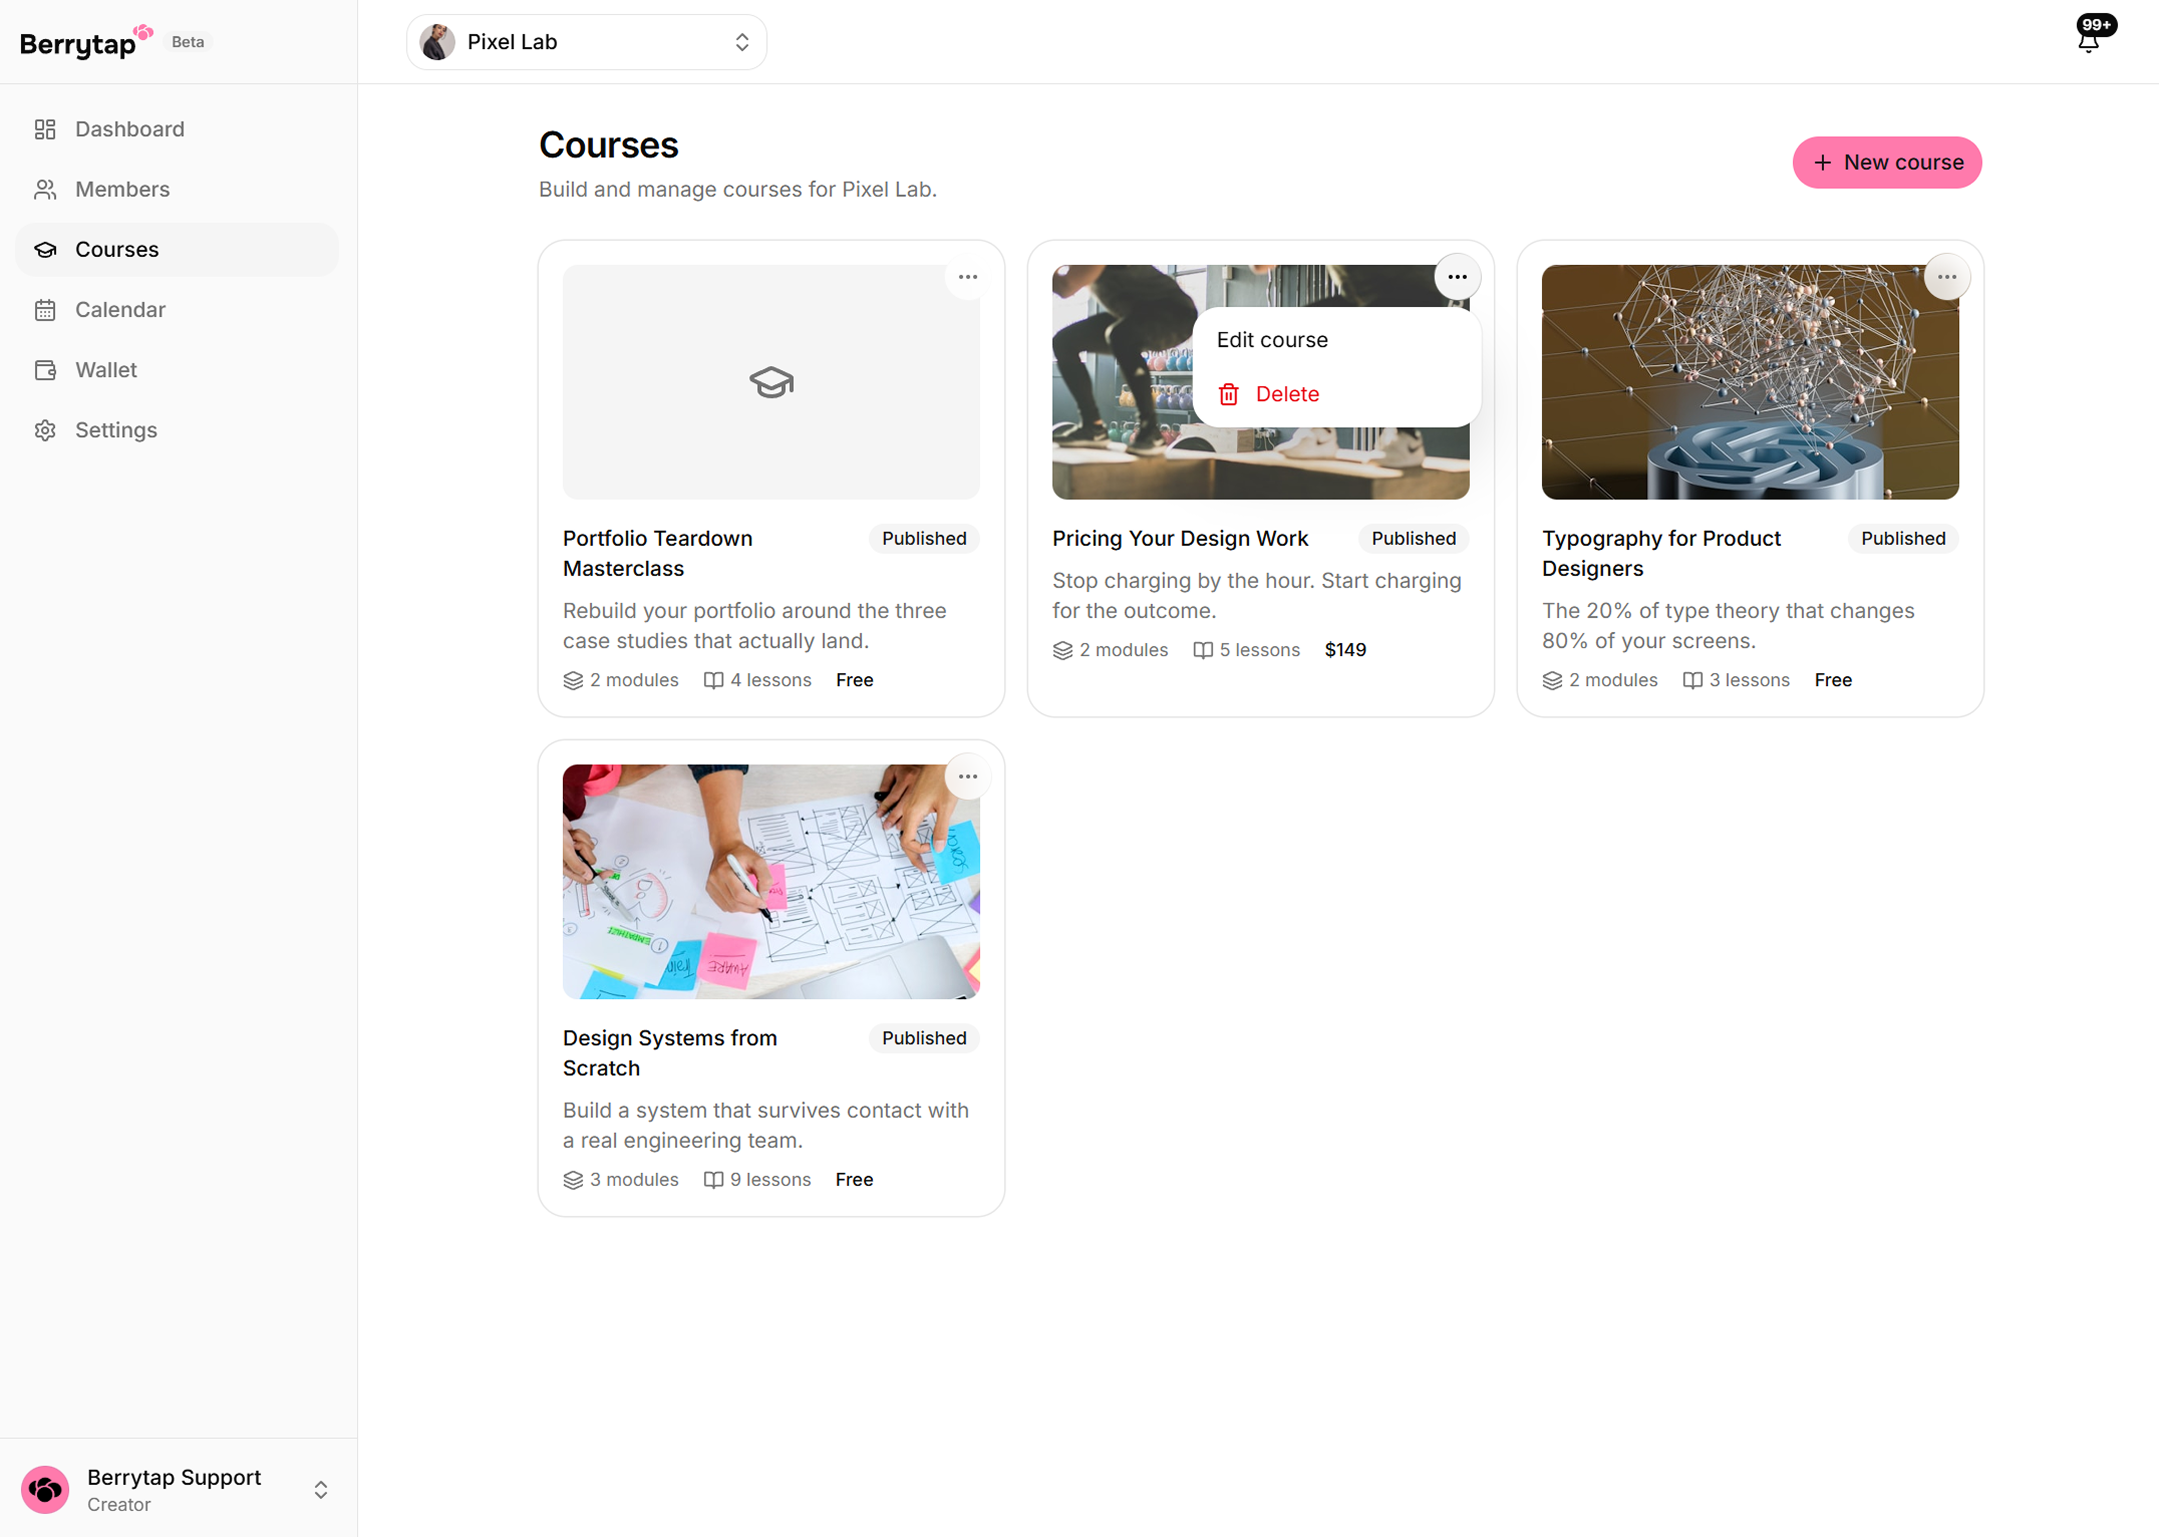
You can also edit or delete a course straight from its card in the library, via the three-dot menu.
For a full walkthrough of pricing, checkout, and earnings, see Paid Courses.
Your plan determines how much video storage you have across all your courses: Free plan includes 1 hour of stored video, Growth includes 25 hours, and Scale includes unlimited storage. Check your current usage and upgrade options on the Plans & Pricing page.